Cyanotype process - Technical details |
You need to start with a negative the same size as the image you wish to produce - or alternatively you can follow the lead of Herschel and Anna Atkins and make photograms.
The solutions
Handle all chemicals carefully. Look up the MSDS for advice on all chemicals and store where children cannot access them.
Make up the following stock solutions using distilled/purified water.
Solution A - potassium ferricyanide 10g
Dissolve in 100ml water.
Solution B - ammonium ferric citrate 5g
Dissolve in 20ml water
(This can be made in a brown form or a green form. If available use the green form as it is more light sensitive.)
You can make up the solutions in larger volumes but B tends to go mouldy. Exact amounts are not critical. Store away from strong light in brown bottles.
Coating the Paper
Use a good quality artists watercolour paper, avoiding any that are described as 'buffered'. Cut into sheets to fit your negative with a good margin on each edge - around 2cm or more. Mark with pencil where the corners of the negative will be so you know exactly where you need to coat.
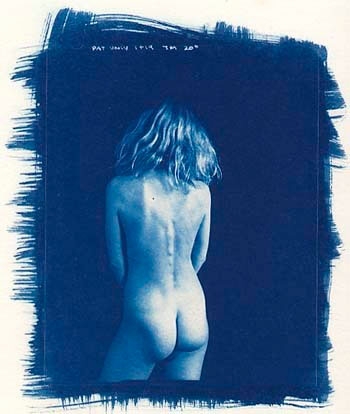
Nude
© Peter Marshall
You need a reasonably large brush, not too stiff. A 'hake' brush with no metal parts is ideal, but you can use a brush with a metal ferrule, such as a watercolour lacquer brush. Alternatively you can use a foam brush.
Work away from sunlight in a dimly lit room. Mix equal volumes of A and B to give the amount of solution you will need for coating a supply of paper for a day's work, allowing around 1ml for 40 square inches of paper.
Dip the tip of the brush into the solution and brush across the paper. Do not let the brush get dry and avoid leaving any puddles on the paper. Use overlapping strokes across the paper to cover the area completely, then brush up and down to ensure there are no gaps. Leave flat to dry for a few minutes before hanging on a line (in dim light) to complete drying.
Printing
Paper must be bone dry before printing. When it seems fairly dry, complete the drying using the lowest heat setting on a hair-dryer, avoiding overheating. It should be pale yellow - no traces of green or blue.
Place under the negative in a printing frame, or under a thick sheet of glass. Expose to sun or other UV source. Typical print times in bright sun are around 25 minutes. It can be useful to expose a step wedge on the edge of the print to help judge exposure. You need to expose until the highlights are quite dark and usually a dull greenish.
Processing
If your tap water is alkaline, fill a bucket and add a pinch or two of citric acid (if you are not sure, just do it.) If your supply is acid, then use it just as it comes out of the tap. If it is under 15 C, then add some hot water to the bucket. Wash in 5-10 changes of water over 5-10 minutes, then dry on a screen or line. The colour will deepen slightly over some hours.
| |
